Showing posts with label guest post. Show all posts

Wednesday, January 28, 2015

Monday, March 25, 2013

Framing Vintage Scarves


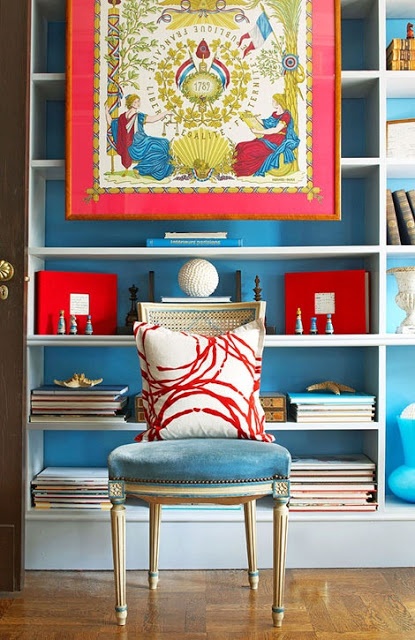
Now that the One Room Challenge is over, I am turning my attention back to my home office makeover. One project I have planned is a gallery wall. I have in mind framing a vintage scarf as the largest piece and focal point. Perhaps you already have a lovely vintage scarf you would like to frame - Hermes and Pucci are classics. A very well priced and readily available alternative on Etsy and eBay are vintage Vera scarves. You can find these in hundreds of beautiful designs and every color. I will be on the hunt for one this week, and will post my progress as well as a tutorial on DIY framing. For more inspiration, check out my new Pinterest board here on "Framing Vintage Scarves." You can follow all my Pinterest boards here.

I also have a guest post today on The Glam Pad where I am continuing my virtual makeover of The Chinese Village House. Today I redo the home office.

These framed scarves are examples to inspire me and perhaps you.


Monday, February 18, 2013

Zebras and Palm Beach Chic


Do you love zebras? They are so Palm Beach Chic. I scored this beautiful finished needlepoint on Etsy yesterday that I will have made into a pillow. Think needlepoint is too old school? Not me. I love it. Designers like Jonathan Adler use lots of needlepoint but in a more modern way. I'm thinking about a great black and yellow trim on this to edge it up a bit.

Check out my Pinterest board on Zebras here. And go pop over and see my inspiration board today on The Glam Pad - my first post in a series on how I would makeover the Chinese Village House in Coral Gables, Florida. Click here to see my vision for the entryway and the main hall - there are zebras galore! Next up in the series will be the dining room.

Friday, February 15, 2013

Chinoiserie Chic in Florida

Artwork by Laura Mullaney
My favorite new blogger, Andrea at The Glam Pad, a transplanted Texan, is renovating a house in Coral Gables, Florida with her husband. She loves all things Chinoiserie, Hollywood Regency and Palm Beach Chic. A fabulous historic Chinoiserie property has just gone on the market in Coral Gables. Not their house, although I suspect she would love it. Andrea had the fun idea of me doing a virtual renovation and interior decoration of the property. It really needs work! Beginning Monday, I will choose a different room each week and create an inspiration board with my vision of the house. I will begin with the entryway and main hall.

Pop over and see Andrea's house tour today of Chinese Village House and then stay tuned to The Glam Pad for this fun new series.

Tuesday, December 4, 2012

My Virtual Living Room at Design du Monde

The vintage Fornasetti ottoman I used as a cocktail table
DC area artist Kerry Steele (I have two of her pieces) and blogger (Design du Monde) had the very clever idea of asking some local interior design bloggers to each create a room for a Virtual Show House shown below. I was asked to design the living room. Please go check it out here. It reflects my interior design aesthetic and some of the operating principles I tend to use in doing a room -

A mix of high end and accessible pieces
A dramatic piece of art - generally an abstract
A pop of red
A mix of new, vintage, and antique
Traditional, but with a fun and whimsical edge
Black to ground the pastels I am drawn to
An investment piece to really up the ante of the room
A neutral, classic couch
Elements of Chinoiserie


Friday, October 19, 2012

Guest Posting at My Crafty Home Life - Nantucket Chinoiserie Style


My friend Linda asked me to guest post today over at My Crafty Home Life on Nantucket Chinoiserie Style. OK, so we just made that style up - sue us. She is posting 31 days on Nantucket Style, so of course I had to figure out what a great Nantucket beach house with Chinoiserie elements would look like. I think my choices are wonderful for a home anywhere, not just the beach.

Linda also has a cute story introducing the post about how we met and became friends. Here is my side of it. Linda, who I did not know, emailed me if I would be interested in having her do a guest post on a DIY Chinoiserie pagoda cornice board she was doing for her dining room. I had NEVER allowed anyone to do a guest post on my blog EVER. I do not have a DIY blog, I am a control freak, and I am a perfectionist. I knew she was friends with The Pink Pagoda, so in a weak moment I said yes and immediately regretted it, thinking I would live to regret it even more. BTW, Linda has a wonderful giveaway from The Pink Pagoda here.

Linda sent over to me a huge post with pictures I couldn't open. I really felt like telling her to do it correctly and send it to me or to forget it. It ended up with her sending me each picture individually and my redoing the entire (many swear words........) post that took me hours. Here is that famous guest post.

A short time later, Linda asked me to participate in the One Room Challenge that I also wished I had said no to. I do NOT like group projects and do not like other people setting the ground rules. Fast forward.

The long and the short of it is that I had a wonderful experience doing the One Room Challenge - click on the One Room Challenge button in my sidebar if you missed it. Linda and I have become BBF - Best Blogging Friends and I don't think a day goes by that we don't ask each other advice on an interior design project, a legal question, a blogging question, have a snarky remark about other bloggers (I bet you wonder who), or our take on all sorts of matters of the world. I have threatened to start charging her by the hour for legal and interior design questions though.

As for guest posts on my blog, I haven't taken another one since. I'm not stupid. Who was it that said that insanity is repeating the same mistake and expecting a different result? And by the way Linda, it's good you do ask me interior design questions. Here is her post deciding on a driftwood console over the vintage elephant one she has been hunting for. I am going to save these awful driftwood photos for my next April Fool's Day post though!

Tacky, not chic!

Fabulous!

Thanks girlfriend, I know we'll be talking soon.

Friday, August 10, 2012

Guest Posting Today at My Crafty Home Life


Today I am guest posting over at My Crafty Home Life. I hope you'll pop over and see the Chinoiserie kitchens that inspired me in transforming my own kitchen for the One Room Challenge and how I interpreted that inspiration in my own space.


Tuesday, February 21, 2012

Guest Tutorial from My Crafty Home Life - Pagoda Cornice


Hello Chinoiserie Chic readers. I’m Linda, from My Crafty Home Life. I decided to give my dining room a much needed makeover. I joined fourteen other bloggers in the One Room Challenge, where each of us tackled a room in our home….start to finish. I would like to show you how I made my Custom Pagoda Cornice.


It all started with this image that Chinoiserie Chic posted.


This one is made with fabric. I wanted to create a similar look using decorative moldings. On a recent trip to Lowe’s, I found this….an outside return for crown molding.


It is made out of polystyrene….and when I inverted it, I saw this.


The beginning of my Pagoda Cornice; and here are all the pieces I used for the bottom portion.


The Greek key is from a fancy lumber store and it is wood. First, hang your drapes to your desired width. I like to hang mine a bit wider than the window. Once your drapes are hung, hold your inverted end piece in the finished position.


Measure for your custom length and cut a board (I used a 1x2) for mounting to length. Now using some adhesive caulk - 


Add a bead to the inside of your corner piece and place it on the end of your mounting board. If needed, tape it in place until it is dry.


Cut the molding to length and using some nails and caulk, continue down the row…add the other end.


Once that piece is secure and dry, add the Greek key….cut to length and miter the corners. I stepped the Greek key out to give it more interest.


Once this is finished with the return added, place it on some “L” brackets in above your window (remove drapes to keep them clean).


This is the bottom portion of the cornice. Now it needs a top. I chose this profile from the same fancy lumber store.


I cut the ends on a 45 degree angle and mounted it on a square piece of filler to give it an extra profile. I also decided to add some gold paint on some of the details.


Your offset will be determined by your own personal preference.


Here are the profiles I used for my cornice.


…and here is the finished cornice over my drapes.


Thank you, Beth, for letting me show your readers how I made this cornice. Many of the Chinoiserie Chic images can be made into DIY projects…that’s why I follow it on Pinterest!

Wednesday, June 23, 2010

Shop Like a Design Blogger


Averill at Odi et Amo has been running an excellent series called "Shop Like a Design Blogger." Each week, a design blogger guest posts about her favorite design shopping sources. I would love it if you would stop by and read my guest post today. You will learn how to train your eye to become a great Chinoiserie shopper, my tips for adding Chinoiserie to your home, and all my favorite sources for my great Chinoiserie finds. Please stop by and leave a comment. Thanks-Beth

Wednesday, May 5, 2010

My Guest Post on The Shiny Pebble


Today I hope that everyone will pop over to The Shiny Pebble to check out my guest post. Catherine Hopkins has been doing an excellent series on her blog where she has asked a group of interior design bloggers to do a virtual makeover of her dining room. I kept all of her existing furniture and focused on Chinoiserie accessories, transforming her traditional Houston dining room in her newly built home into a timeless and elegant British colonial oasis. This makeover reflects my design approach that fabric and accessories are what make or break a room, not the furniture. Thanks also to The Daily Basics for featuring this series.