Showing posts with label My Crafty Home Life. Show all posts

Friday, October 19, 2012

Guest Posting at My Crafty Home Life - Nantucket Chinoiserie Style


My friend Linda asked me to guest post today over at My Crafty Home Life on Nantucket Chinoiserie Style. OK, so we just made that style up - sue us. She is posting 31 days on Nantucket Style, so of course I had to figure out what a great Nantucket beach house with Chinoiserie elements would look like. I think my choices are wonderful for a home anywhere, not just the beach.

Linda also has a cute story introducing the post about how we met and became friends. Here is my side of it. Linda, who I did not know, emailed me if I would be interested in having her do a guest post on a DIY Chinoiserie pagoda cornice board she was doing for her dining room. I had NEVER allowed anyone to do a guest post on my blog EVER. I do not have a DIY blog, I am a control freak, and I am a perfectionist. I knew she was friends with The Pink Pagoda, so in a weak moment I said yes and immediately regretted it, thinking I would live to regret it even more. BTW, Linda has a wonderful giveaway from The Pink Pagoda here.

Linda sent over to me a huge post with pictures I couldn't open. I really felt like telling her to do it correctly and send it to me or to forget it. It ended up with her sending me each picture individually and my redoing the entire (many swear words........) post that took me hours. Here is that famous guest post.

A short time later, Linda asked me to participate in the One Room Challenge that I also wished I had said no to. I do NOT like group projects and do not like other people setting the ground rules. Fast forward.

The long and the short of it is that I had a wonderful experience doing the One Room Challenge - click on the One Room Challenge button in my sidebar if you missed it. Linda and I have become BBF - Best Blogging Friends and I don't think a day goes by that we don't ask each other advice on an interior design project, a legal question, a blogging question, have a snarky remark about other bloggers (I bet you wonder who), or our take on all sorts of matters of the world. I have threatened to start charging her by the hour for legal and interior design questions though.

As for guest posts on my blog, I haven't taken another one since. I'm not stupid. Who was it that said that insanity is repeating the same mistake and expecting a different result? And by the way Linda, it's good you do ask me interior design questions. Here is her post deciding on a driftwood console over the vintage elephant one she has been hunting for. I am going to save these awful driftwood photos for my next April Fool's Day post though!

Tacky, not chic!

Fabulous!

Thanks girlfriend, I know we'll be talking soon.

Friday, September 14, 2012

The Elephant That Got Away

Ruthie Sommers
Linda from My Crafty Home Life emailed me a couple days ago that ever since seeing this elephant console above on Chinoiserie Chic, she has been trying to find one and had spotted this one just below on Craigslist. It is located near her in Woodland Park, New Jersey for $225 or best reasonable offer.

My advice was that I would inflict bodily harm on her if she didn't get it. Linda has decided to pass and I would love to see somebody grab this. I wish it were closer to me - between my house, my daughter's apartment, and interior design clients, I can usually figure out a home for things.

Here is some inspiration. BTW, the tusks need some work, but this could be restored professionally or by a clever DIYer. Speaking of DIY, I never ever do DIY projects and am starting one soon. I will keep you posted on the likely debacle.


This one is currently available on 1st dibs for $3500 and I don't like it as much!


;-)


Friday, August 10, 2012

Guest Posting Today at My Crafty Home Life


Today I am guest posting over at My Crafty Home Life. I hope you'll pop over and see the Chinoiserie kitchens that inspired me in transforming my own kitchen for the One Room Challenge and how I interpreted that inspiration in my own space.


Tuesday, August 7, 2012

One Room Challenge Chinoiserie Series


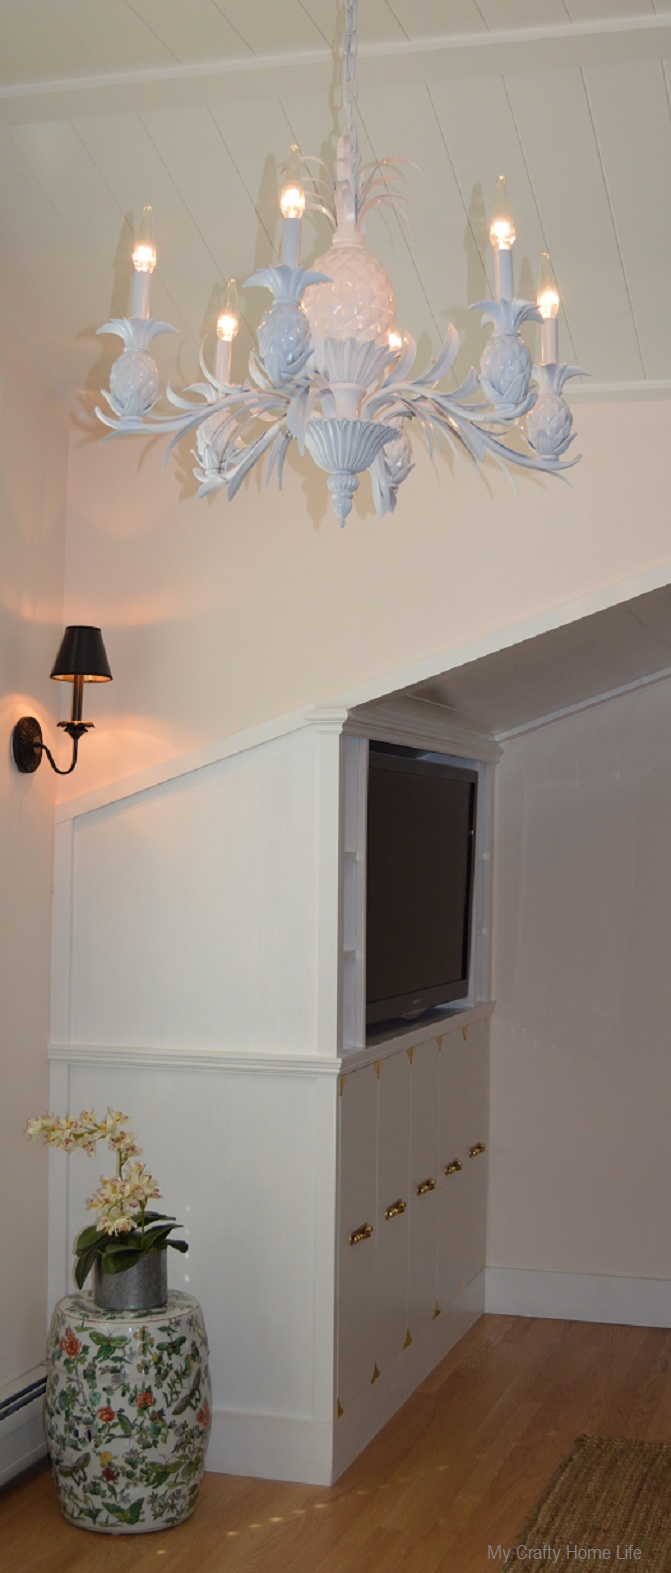
Linda from My Crafty Home Life was not only the fearless leader and intrepid organizer of the One Room Challenge, she transformed her master bedroom into a Chinoiserie Chic paradise. You must check out her reveal post to see all the details including Ikea hack built-ins with coral pink painted backs and brass hardware, ginger jar prints from The Pink Pagoda, vintage faux bamboo mirrors painted coral pink, Ikea hack bedside chests in mint green with gold O'verlays, a fabulous collection of vintage Chinoiserie paint by numbers turned into a gallery wall, and a pineapple chandelier that went from creepy Colonial to Palm Beach chic. Isn't this fabulous!


Monday, July 9, 2012

One Room Challenge: Colonial to Chinoiserie

Ruthie Sommers - Coastal Living

Linda, of My Crafty Home Life, the organizer of The One Room Challenge, is redoing her master bedroom. She asked her readers if she should get rid of her pineapple chandelier. I am here to weigh in. No! This is a classic piece that can go from Frumpy Colonial to Palm Beach/Hollywood Regency/Chinoiserie Chic with just a coat of paint. Here are examples in a range of colors from shelter magazines and Palm Beach stores with prices up to $1600. White or black would be classic choices, but they are all great. Tips - Paint it all one color - no metallics or gold touches. No chandelier shades. Put the chandelier on a dimmer. Use some chic chandelier bulbs - I am addicted to the Satco Clear Prismatic. Paint the chain too!

Linda's Pineapple Chandelier

Vogue Living - Black

H & H on OKL - Deep Green

Palm Beach Vintage - Beige

Palm Beach Vintage -  Cream

Vintage White - check out the funky bulbs

Palm Beach Vintage - Ivory

Palm Beach Vintage - Gray

Thursday, April 5, 2012

Thanks to My Crafty Home Life


Linda from My Crafty Home Life did an absolutely precious post yesterday about her fantasy of having cocktails with Chinoiserie Chic. You will remember Linda from the guest tutorial she did here on creating a pagoda cornice. Thanks and cheers!


Thursday, February 23, 2012

The Pagoda Doorway DIY

House Beautiful
Did you see the tutorial I posted on Tuesday from My Crafty Home Life on creating a pagoda cornice for a window? A reader of Chinoiserie Chic suggested that this same project could be used for a doorway. A wonderful idea!

Claydon House

Ruthie Sommers

A Restaurant

Tuesday, February 21, 2012

Guest Tutorial from My Crafty Home Life - Pagoda Cornice


Hello Chinoiserie Chic readers. I’m Linda, from My Crafty Home Life. I decided to give my dining room a much needed makeover. I joined fourteen other bloggers in the One Room Challenge, where each of us tackled a room in our home….start to finish. I would like to show you how I made my Custom Pagoda Cornice.


It all started with this image that Chinoiserie Chic posted.


This one is made with fabric. I wanted to create a similar look using decorative moldings. On a recent trip to Lowe’s, I found this….an outside return for crown molding.


It is made out of polystyrene….and when I inverted it, I saw this.


The beginning of my Pagoda Cornice; and here are all the pieces I used for the bottom portion.


The Greek key is from a fancy lumber store and it is wood. First, hang your drapes to your desired width. I like to hang mine a bit wider than the window. Once your drapes are hung, hold your inverted end piece in the finished position.


Measure for your custom length and cut a board (I used a 1x2) for mounting to length. Now using some adhesive caulk - 


Add a bead to the inside of your corner piece and place it on the end of your mounting board. If needed, tape it in place until it is dry.


Cut the molding to length and using some nails and caulk, continue down the row…add the other end.


Once that piece is secure and dry, add the Greek key….cut to length and miter the corners. I stepped the Greek key out to give it more interest.


Once this is finished with the return added, place it on some “L” brackets in above your window (remove drapes to keep them clean).


This is the bottom portion of the cornice. Now it needs a top. I chose this profile from the same fancy lumber store.


I cut the ends on a 45 degree angle and mounted it on a square piece of filler to give it an extra profile. I also decided to add some gold paint on some of the details.


Your offset will be determined by your own personal preference.


Here are the profiles I used for my cornice.


…and here is the finished cornice over my drapes.


Thank you, Beth, for letting me show your readers how I made this cornice. Many of the Chinoiserie Chic images can be made into DIY projects…that’s why I follow it on Pinterest!